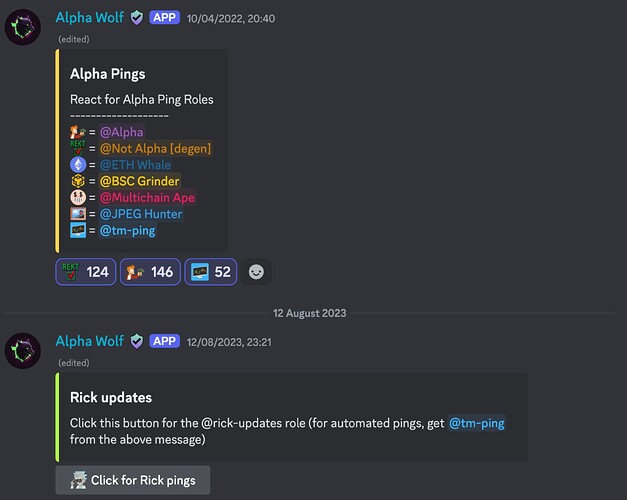
Here’s how you can use MEE6, Carl, and Dyno bots to set up role selectors in your Discord server:
MEE6 Bot
MEE6 allows users to self-assign roles using reactions:
- Installation: Add MEE6 to your Discord server from the MEE6 website.
- Dashboard Setup: Navigate to the MEE6 dashboard and enable the “Reaction Roles” plugin.
- Role Configuration: Within the plugin, create a message where users can react to assign roles. Set the emojis for each role, so users can click on an emoji to get a role assigned automatically[1].
For more detailed steps, check out MEE6’s Tutorial.
Carl Bot
Carl Bot is popular for managing reaction roles:
- Installation: Invite Carl Bot to your server using the official site.
- Dashboard Access: Access the Carl Bot dashboard and go to the “Reaction Roles” section.
- Creating Reaction Roles: Define a message with roles and corresponding reactions. Users can then interact with these reactions to self-assign roles within the server[2].
For a detailed guide, check How to Make Discord Reaction Roles with Carl Bot.
Dyno Bot
Dyno is another useful tool for setting up role selectors:
- Installation: Add Dyno to your Discord server from the Dyno website.
- Module Activation: Enable the “Reaction Roles” feature from the Dyno dashboard.
- Setting Up Roles: Craft a message and assign roles to specific reactions. This allows users to gain or lose roles by reacting to that message[3].
For additional instructions, refer to Dyno’s Reaction Roles Guide.
These bots provide a robust set of features for automating role assignments and improving server interaction.
[!bot] This guide is AI generated: 2024-12-02T23:00:00Z
Example
Curious how this works? In Rick’s Lab you can see various selectors in action: #role-select - this is managed by MEE6 ![]() ︎
︎
